Tracker battery replacement
The batteries inside a (2.0) tracker can be replaced. Bad news: It's a weird 3.85v battery, and there's no space inside the tracker to actually use a larger one so you're still basically stuck with a fresh replacement rather than upgrade.
good news: these batteries are available and aren't expensive.
Model: B2PYV100
What to look out for: chinky batteries aren't worth the $10 you save, they are often worse than the worn-out battery you're replacing. Get batteries from a reliable retailer; they should have blue/green/black cables, not red/white/black.
Note: 3.0 trackers actually use the same battery, but I don't have one to open so the screw layout/count might be different.
Tools needed: Screwdriver with a TORX T5 bit. (0.5mm bit). And a sharp knife. And some tweezers.
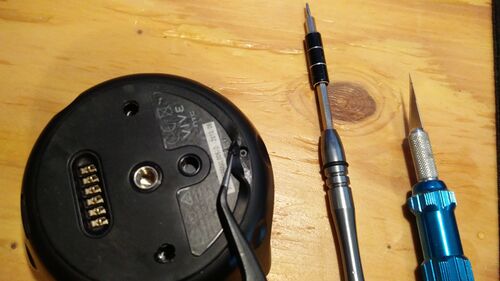
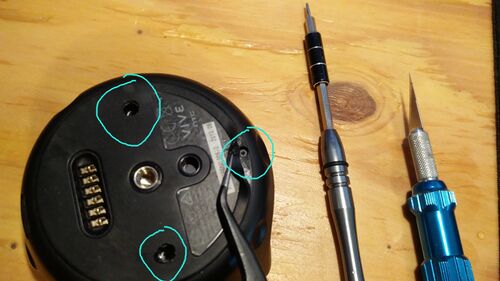
1. Find the screws in the back. There are THREE. See the image: the cutouts are where the two main ones are and the third is under the flap here.
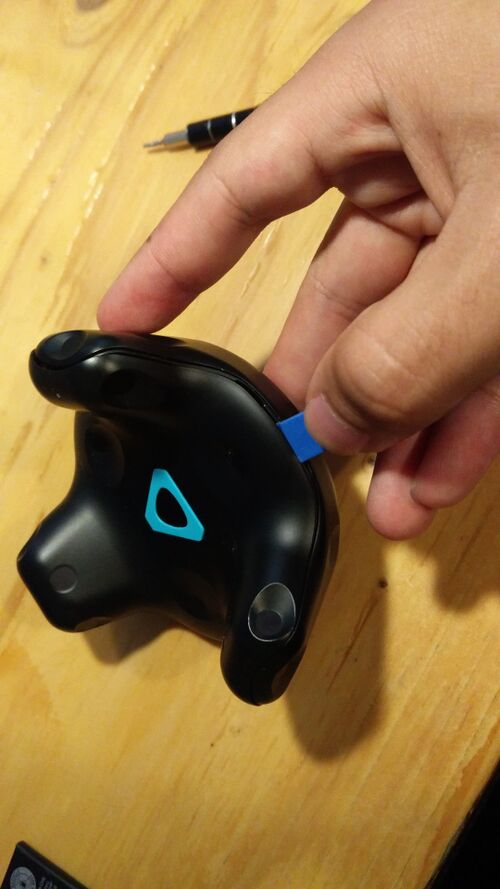
2. Pop off the top cover
3. There is ANOTHER SCREW holding on the circuitry core, unscrew that, then peel open the arms a bit and wiggle the core out. It's easiest to wiggle the LED prong out last because there's a little extra tab on that bit.CAREFUL with the DIODES! They stick out a bit and get caught by the casing.
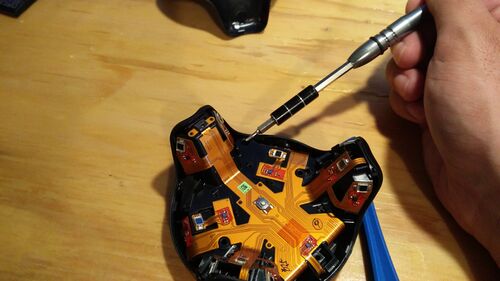
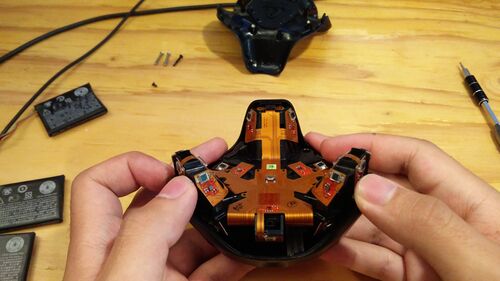
4. There is a ribbon cable attaching the main core to the base. It's easier to unscrew the little port area attached to the base than fuck with ribbon cables. There's 4 screws, one is covered with a bit of tape, make sure to keep hold of that tape and recover when rebuilding.
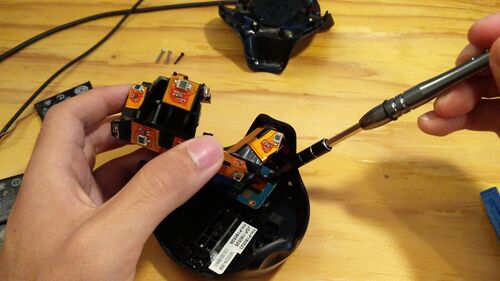
5. Flip the core over and unscrew the 3 screws holding the circuitry on, and unplug the battery. The plug goes in from the top rather than sliding in. (This is an easier alternative to unplugging the ribbon cables; I did that once and it SUCKS ASS getting them back in).
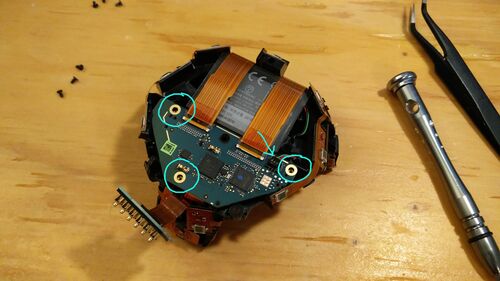
6. you can unfold the ribbon cable sections to get access to the battery. There's a little plastic guard, remove that. Then GENTLY lever out the battery. It's glued in; DO NOT PIERCE THE BATTERY.
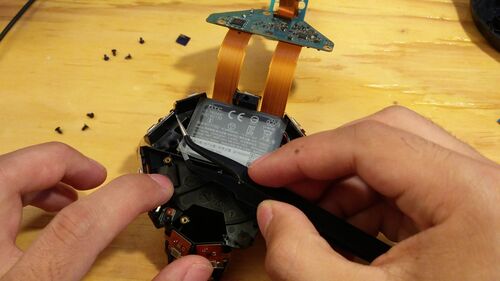
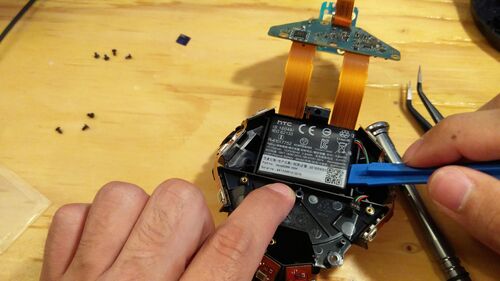
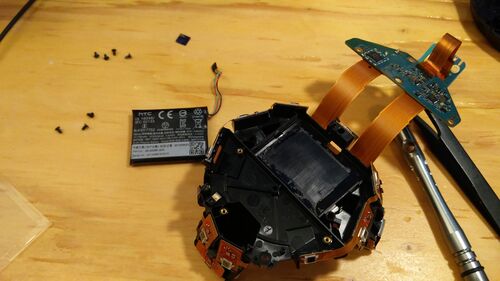
7. Put the new battery in and basically do the stuff above but in reverse order:
- Refold the circuitry back together; screw in then plug in the battery.
- Screw the loose charging port bit into the base of the tracker (remember the bit of tape!). Pay attention to rotation; the core is not rotationally symmetric. (one prong has an LED, this led prong should go in the same section as the microusb port)
- Put the circuitry core back in the base; put the LED prong in first and slide the rest down into the base. Expand the legs by pulling the base legs apart to slip the case over the diodes; be careful not to knock one off! They're not super fragile but don't risk it.
- Remember the one screw that attaches the core to the base.
- Put the top cover on. It is also not rotationally symmetric; it should just snap on though, no order needed.
- Screw the three base screws back in. Don't tighten too hard; you can over torque and pull the metal threading bit out of the housing. It's fixable but it's more work.
- done!
